 Shopping Cart
06 March 2026
The importance of water tank placement and installation
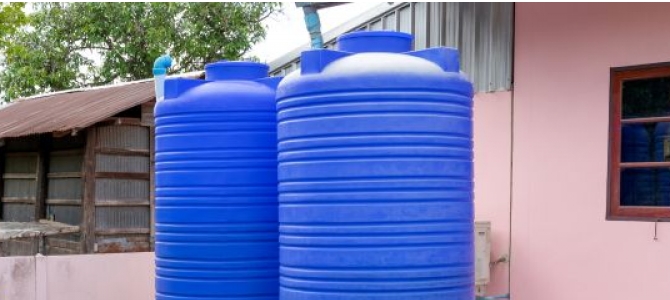
Where and how you install your water tank has a huge impact on how well your water system performs, how long your tank lasts, and how easy it is to maintain. A well-chosen location and a correctly installed base, plumbing and power supply can be the difference between a reliable, low-maintenance setup and one that constantly causes headaches.
In this guide, we’ll walk through the key considerations for water tank placement and installation for both homes and commercial sites, and look at how smart monitoring can help you get more from your tank.
Start with your water storage needs
Before you choose a tank location, it helps to be clear about how much water you need to store and what you’ll be using it for.
Ask yourself:
- How many people or activities will rely on this tank (household, garden, stock, business use)?
- Is the water for drinking, household use, irrigation, firefighting, or a mix of these?
- How reliable is your mains or bore supply, and how often do you face restrictions or dry spells?
If you live in a region with frequent droughts or tight summer restrictions, you may need significantly more storage than a similar property with year-round rainfall and fewer limits. Getting this right up front helps you choose the right tank size and ensures your placement and installation plan can accommodate it.
Choosing the right place for your tank
Once you understand your water needs, you can start weighing up where the tank should go on your property. Good placement improves collection efficiency, reduces energy use and makes long-term maintenance much easier.
1. Space, access and safety
First, make sure the location can comfortably accommodate the tank itself and leave enough room around it for access.
Consider:
- Space for installation and future maintenance (room to inspect, clean, service pumps and fittings).
- Safe access for installers and service technicians, including vehicles if needed.
- Distance from driveways and high-traffic areas to minimise impact risk from vehicles or machinery.
Remember that a full tank is very heavy, so your chosen location needs to handle the weight without compromising nearby structures, retaining walls or services.
2. Proximity to catchment and plumbing
It usually makes sense to place your tank close to both your rainwater catchment surface and the areas where the water will be used.
- Locating the tank near downpipes or collection points reduces pipe runs and friction losses.
- Placing it close to your main plumbing or irrigation manifolds keeps supply lines shorter, which can reduce cost, potential leak points and energy use.
Short, efficient pipe runs also help maintain better pressure and flow throughout your system.
3. Elevation and gravity
If your site allows, placing the tank on slightly higher ground can provide useful gravity head. This can reduce the work your pump needs to do or, in some setups, allow for basic gravity-fed supply to certain outlets.
Just be sure that any elevated site is structurally sound and well-engineered, especially for larger tanks.
4. Sun, wind and visual impact
New Zealand’s UV levels are high, and long-term sun exposure can shorten the life of some tank materials, particularly poly. While quality tanks are UV-stabilised, it still helps to consider:
- Partial shading from buildings, fences or landscaping where practical.
- Orientation of the tank to minimise harsh, all-day sun on a single face.
Wind is another factor, especially on exposed rural sites. Strong winds can stress pipework and fittings, so choose a spot with some natural shelter or plan appropriate anchoring and support.
You may also want to think about how visible the tank will be from living areas, neighbouring properties and the street, and tuck it behind structures or integrate it into landscaping where possible.
5. Council rules and site constraints
Finally, make sure your chosen location complies with local council or territorial authority requirements. These may include minimum setbacks from boundaries, buildings and septic systems, height restrictions, and rules around underground tanks or fire-fighting storage.
Checking these early can save costly changes or approvals later in the project.
Tank type, size and shape: why they matter for placement
The type of tank you choose – and its size and shape – will influence where it can be installed and how the base needs to be prepared.
Tank materials
Common tank materials include polyethylene (poly), fibreglass, concrete and steel.
- Poly tanks are lightweight and relatively easy to site on prepared pads, making them popular for domestic above-ground use.
- Fibreglass tanks are robust and algae-resistant, but usually cost more and may require more specialised installation.
- Concrete tanks are extremely sturdy, can often be installed underground or partially buried, and work well where above-ground space is limited.
- Steel tanks can offer large storage volumes and a distinctive look but may require careful protection from corrosion.
Your tank material choice affects not only placement options, but also the type of base and any engineering needed.
Size and capacity
Tank capacity ranges from a few hundred litres for small garden setups to many thousands of litres for rural and commercial sites. Larger tanks need more space, heavier foundations and more careful consideration of access and safety.
Look for a location that allows for your desired capacity now, and any additional tanks you may want to add in future.
Shape and footprint
Tank shape can help you fit storage into tricky spaces.
- Round tanks generally offer the most storage per dollar and are often used where there’s plenty of room.
- Slimline tanks are ideal for narrow side yards and tight urban sites, running neatly along boundaries or walls.
- Under-deck or low-profile tanks can be used where above-ground space is at a premium, provided the structure above is designed for the loads and access requirements.
There’s no single “best” configuration; it’s about matching the tank and location to your property layout and water goals.
Getting the base and ground conditions right
A sound foundation is critical to the long-term performance and safety of your water tank. Poor ground conditions or inadequate base preparation are some of the most common causes of tank issues.
Understand your soil
Different soil types have different load-bearing capacities and drainage characteristics.
- Sandy soils drain well but can shift under load if not compacted correctly.
- Clay soils can support significant weight but may swell and shrink with moisture, affecting stability over time.
- Loamy soils generally offer a good balance, but still need proper preparation.
A professional soil assessment or advice from a qualified installer can help you identify any risks and plan suitable base design.
Stable, level support
Most above-ground tanks require a stable, level pad that spreads the load evenly.
Common approaches include:
- A reinforced concrete slab slightly larger than the tank footprint.
- A compacted and level pad of crusher dust or similar material, where the tank design allows.
Uneven or poorly compacted bases can cause tanks to twist or settle, increasing the risk of leaks, wall deformation or premature failure. For sloping sites, excavation, retaining or engineered platforms may be needed to achieve a safe, level surface.
Levelling, drainage and site preparation
Even once you’ve chosen your general location, careful site preparation helps protect both the tank and surrounding area.
Correct levels and fall
Your tank should sit level so that the water load is evenly distributed across the base. At the same time, the surrounding ground should be graded to prevent water pooling around the tank.
In some cases, a very slight fall away from the tank can help direct stormwater and overflow safely to drains or soakage areas. Just make sure any slope isn’t so steep that it undermines stability or base integrity.
Managing runoff and overflow
Plan where overflow will go before you install the tank.
- Position the overflow outlet where it can discharge away from the base to avoid erosion or waterlogging.
- Consider connecting overflow to stormwater systems, swales or rain gardens where permitted.
Good drainage design protects both the tank structure and nearby buildings or landscaping.
Piping and plumbing: getting connections right
Even the best-placed tank will underperform if the piping isn’t designed and installed correctly.
Inlet, outlet and overflow
A typical rainwater tank will have:
- An inlet from your roof or other catchment.
- One or more outlets to pumps, irrigation or household supply.
- An overflow to safely manage excess water during heavy rain.
Positioning the inlet and outlet at opposite ends of the tank can promote better water circulation and reduce stagnation. The overflow should sit above the maximum operating level and discharge where it won’t compromise the base or neighbouring structures.
Quality materials and secure fittings
All pipes and fittings should be securely supported and sealed to avoid leaks and movement. Using high-quality, appropriately rated plumbing components helps ensure durability, especially in exposed outdoor environments.
Regularly inspecting visible pipework for signs of wear, UV damage, blockages or leaks is a simple way to keep your system running efficiently.
For more complex systems, or where tanks are connected into household potable supply, it’s always best to engage qualified plumbing professionals.
Power, pumps and control systems
Most modern tank installations use pumps and control systems to deliver consistent pressure and automate water movement.
Providing a safe power supply
Any powered components, such as pumps, pressure switches or smart controllers, will need a reliable and safe power source. This could be a nearby mains connection, solar power, or a combination depending on your setup.
All electrical work must comply with local regulations and should be carried out by a licensed electrician, particularly for hard-wired equipment or wall-mounted controllers.
Pump and pressure management
Pumps move water from your tank to where it’s needed, and pressure switches or controllers help maintain consistent pressure and protect the pump. Correct placement of pumps and pressure control devices, along with appropriate pipe sizing, will improve performance and reduce wear and tear.
Take care to protect pumps from flooding, direct weather exposure and physical damage, while still leaving access for servicing.
How Smart Water monitoring supports better placement and installation
Placement and installation decisions are easier when you can see how your system behaves over time. Smart Water tank level monitoring systems give you real-time insights into water levels, usage patterns and refill rates, all from an app or in-home display.
With Smart Water you can:
- Track how quickly your tanks refill and empty, helping you confirm that your catchment and placement are working as expected.
- Detect leaks or unusual usage early, which can sometimes indicate pipe or base issues at the installation site.
- Use historical data to plan future tank upgrades, additional storage or relocation if your needs change.
Smart Water’s wireless, solar-powered tank level senders are designed to work across a wide range of tank types and installations, from domestic rainwater systems through to larger commercial sites.
Frequently asked questions
Where is the best place to put a water tank?
The best place for a water tank is somewhere that provides a stable, level base, efficient pipe runs to your catchment and supply points, and safe access for maintenance. Ideally, it will also offer some protection from extreme sun and wind and comply with local council requirements.
Does my water tank need a concrete base?
Not always, but many larger or heavier tanks benefit from a reinforced concrete slab, and some manufacturers specify it. Others can sit on a properly prepared compacted base, as long as it is level, stable and designed for the tank type and capacity. Always follow the installation recommendations for your specific tank.
Can I install a water tank on a slope?
Yes, but the area for the tank itself must be correctly levelled, and the base designed to safely handle the loads. On sloping sites, this may involve excavation, retaining walls or engineered platforms, and careful management of runoff and overflow to protect the base.
Do I need a plumber or installer, or can I do it myself?
Smaller, above-ground tanks can sometimes be installed by experienced DIYers following the manufacturer’s guidelines. However, for larger tanks, complex plumbing, underground installations or systems connected to household potable water, it’s strongly recommended – and sometimes required – to use qualified professionals.
How does Smart Water fit into my tank installation?
Smart Water systems are installed at the tank and connected to an in-home display or WiFi gateway, giving you live level and usage data. Planning for the sender location, signal path and power for any indoor components as part of your placement and installation process helps ensure reliable monitoring from day one.
Thoughtful water tank placement and professional installation set your entire water system up for long-term success, and smart monitoring from Smart Water gives you the visibility to keep it running at its best.
Post first published 17 November 2023 and last updated 6 March 2026